304.821.1326
Vintagemotorcarco@aol.com
The VMC Restoration Process
Restore
The Vintage Motorcar Company staff is well-versed in the arts of preservation, conservation and repair of original unrestored vehicles, as well as complete authentic restoration. Whether you are interested in preserving the original features and integrity of an HPOF certified classic or incorporating the latest technical innovations into your resto-rod, VMC can help.
Revive
Safety is a top priority at VMC. Each project is carefully inspected and tested for operation and performance. Many times, older concealed damage is found that owners have no idea exists. Our restoration technicians document all findings and a written report is then reviewed with clients, item by item. Photos and drawings are made, carefully documenting original features as well as repair needs of the project. Photos are also provided to the clients throughout the entire restoration process.
The Restoration Process
Clients often request a better understanding of what we do. To begin, we spend approximately two (2) days going over the car and preparing an inspection report. This nine (9) page document details what is needed to fully restore the vehicle and contains information on the vehicle's safety, electrical, mechanical and cosmetic needs.
1. Inspect project for operation, performance and safety. Drive vehicle (if possible) and note any issues detected. Perform compression test and leak down test on engine (if possible.)
a. Older, concealed damage may be discovered at this point. Note: All concealed damage may not be able to be documented at this time as it is not fully visible in some instances until the car is disassembled and the body is taken down to bare metal.
2. Restoration Technicians document all findings and a full written report/list is created and reviewed, item by item, with the client. Intended use for the vehicle is considered in determining the scope of the project’s requirements.
3. Photos and drawings are made to carefully document the original features as well as the cosmetic restoration and repair needs of the project. (Photos are provided to the customer throughout the process at no charge.)
4. General research (and later in the process, more specific, detailed research) on the project will be done as needed. Documents, manuals and photographs are studied and collected for authenticity of the car and its parts. The depth of the research is directly related to the customer’s goals for the project—a driving restoration will require less than a car intended for concourse type shows and awards.
5. The project is meticulously disassembled.
a. Less disassembly for repairs and partial restorations.
b. More disassembly for larger complete restoration.
6. Parts and components are placed and stored in such a manner as to protect them—typically bagged, boxed and tagged so that they are accounted for throughout the project’s progress.
7. As disassembly continues, parts lists and services required from outside vendors are determined and documented. Parts and materials may begin to be ordered—especially items with long lead times, difficult to source and rare parts.
8. Following disassembly, degreasing, stripping and cleaning of each part begins.
a. Each major component is kept intact until it is time to address individually.
b. Years of grunge, grit and grime must be removed carefully and skillfully using the most appropriate processes to avoid damage.
9. After pre-cleaning, engines, transmissions and rear differentials are disassembled.
a. All external and internal parts are thoroughly cleaned and inspected for wear and damage.
b. Parts lists continue to be written, updated and reviewed.
c. Findings are presented to the customer—recommendations and options are discussed, and a course of action is decided.
d. Any necessary mechanical repairs (machine shop work, rebuilding, etc) are set into motion.
10. Upholstery and interior parts are disassembled and evaluated. Some parts may need metal and body work as well. Recommendations are made and discussed with the customer.
11. Items outsourced for specialized repairs/services are returned, refinished, and detailed.
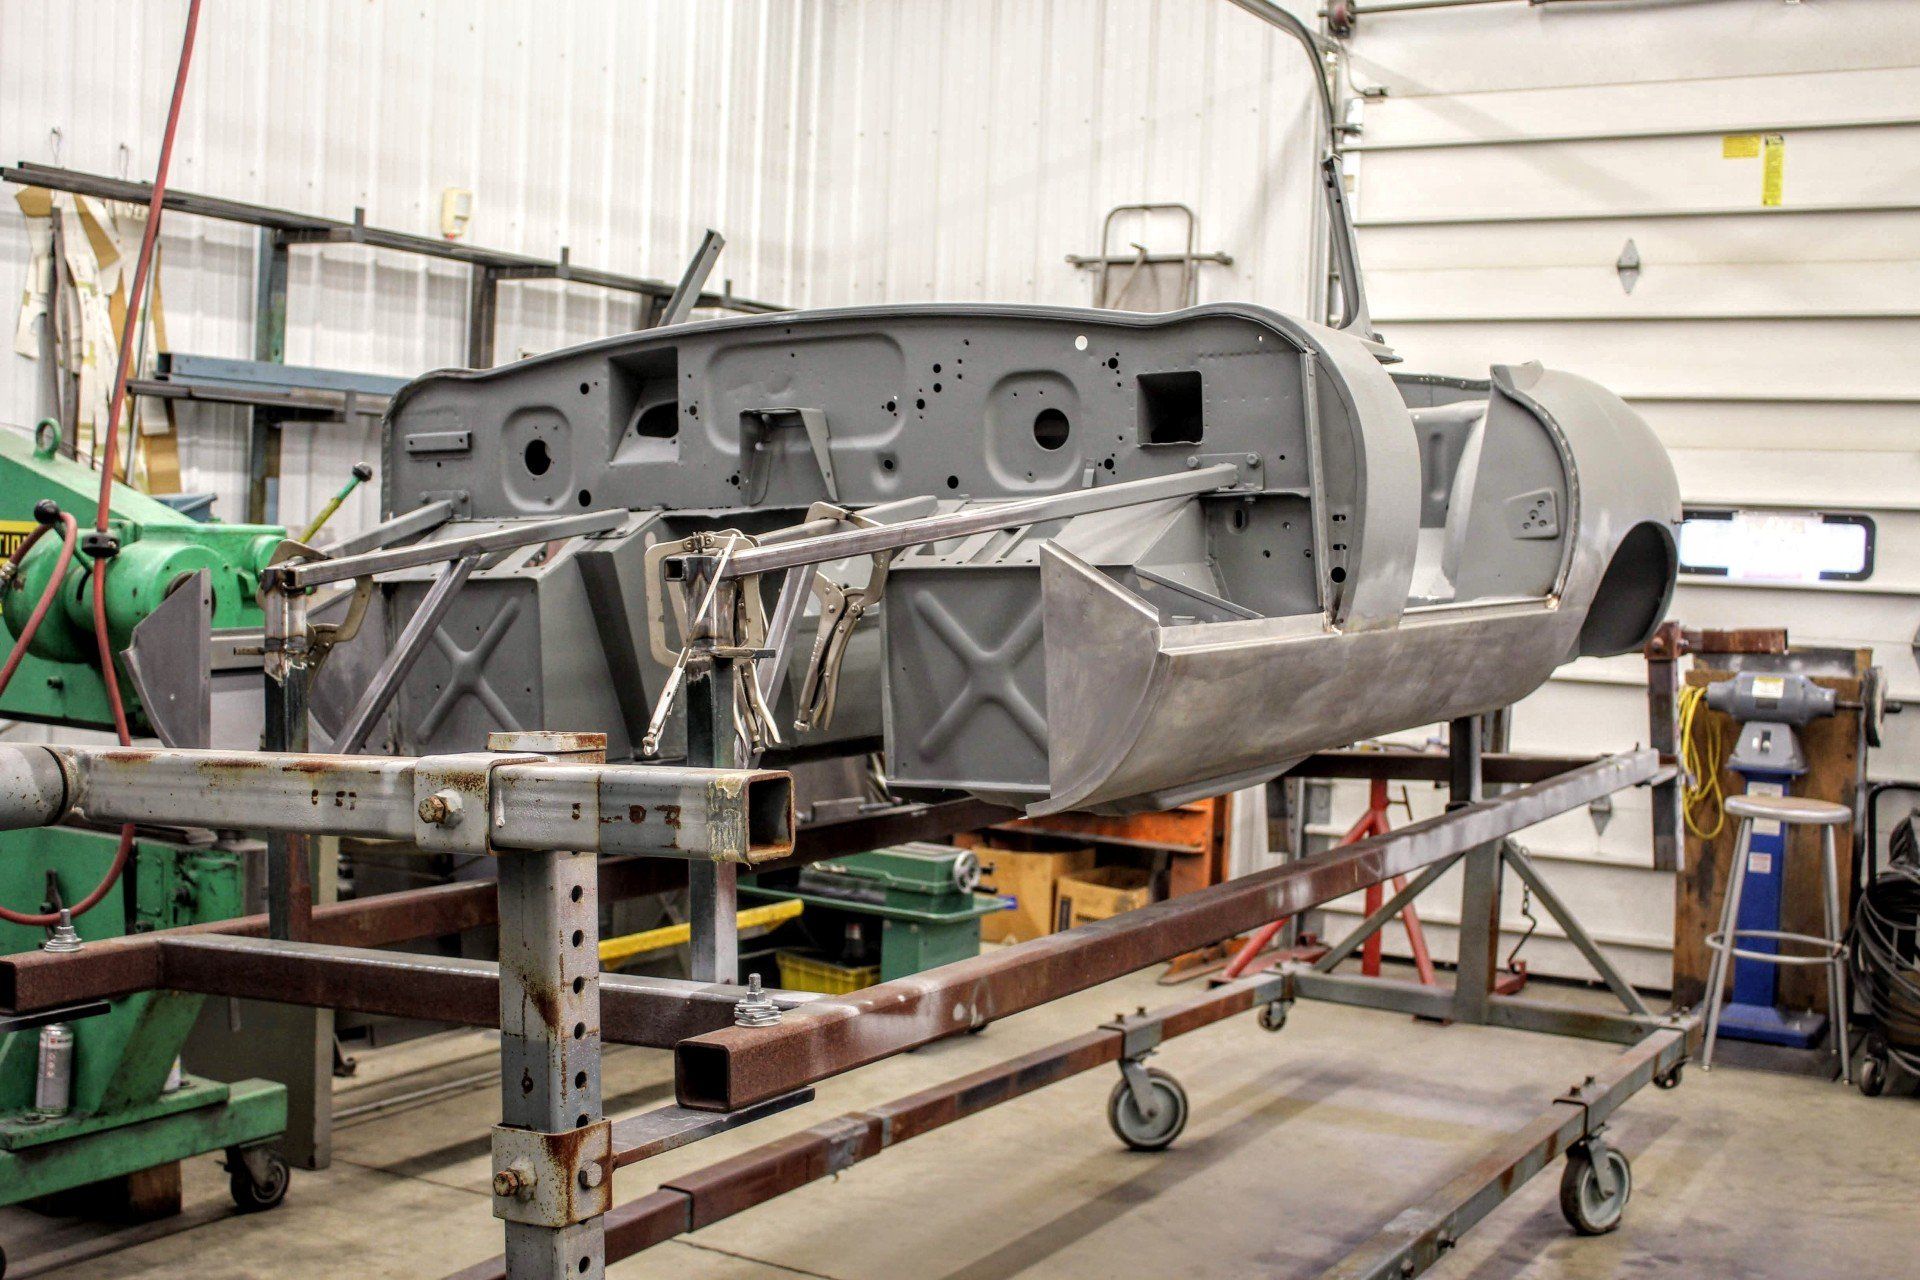
12. Body shells, panels and frames are stripped to bare metal using the most appropriate process to avoid damage.
a. The stripped body, panels and frame are evaluated for condition.
13. Sheet metal repairs are required on almost all antique and classic automobiles.
a. Many projects are rusted to the point of affecting safety.
b. If any previous repairs were “just enough to get by” these repairs may need to be removed and started again.
c. The sign of a well-done repair is that it is invisible.
d. Ignoring repairs puts owners, their passengers and others on the road at risk.
e. Findings are again discussed with the customer and best course of action to effect repairs determined.
14. Rusted sections of bodies are cut and removed one by one. Repaired, fabricated or replacement panels are fitted and installed.
a. Each panel is hand fitted and shaped to match the original contours of the body.
a. Many times, panels are overlapped by the factory, such as inner and outer rocker panels. Each layer is removed and replaced (welded or riveted) to duplicate exactly the intended purpose.
b. Welds and repairs made during the restoration process are often superior to those of the manufacturer due to the use of MIG and TIG processes.
c. Related parts, panels and trim are fitted to the body as repairs are performed to ensure the accuracy of work performed.
a. Fitting the parts and panels together will save time, aggravation and money during the final assembly.
15. Once sheet metal repairs and fitting are complete, all panels and fitted parts are removed. All shims and hardware necessary to achieve proper fit are bagged and tagged for reuse and reference during final assembly.
16. Stainless steel trim restoration is done and chrome parts are sent out to a vendor following fit up.
17. All bagged and tagged small parts and hardware are cleaned and detailed. Performing at this point in the process allowed time to source more parts if needed.
18. The body shell, panels and related parts are then released to the body shop.
a. All sheet metal components are reasonably straight at this time—there are no dents, dings or any major low spots in the body.
b. Filling material is used only to remove slight imperfections and to smooth the panels.
c. Major body joints that were originally “leaded” are lead filled and filed flush again for durability—just as they originally were.
d. Body shell and panels are epoxy primed prior to any body filling.
e. All panels are skim coated with quality body glaze coat rather than cheap body filler and block sanded to level and smooth.
f. Successive coats of epoxy or urethane primer-surfacer are applied, sanded and leveled.
g. After each application of primer-surfacer is applied, a finer grit of sandpaper is used, graduating up to 500 grit.
h. All parts are painted individually, unless otherwise painted as an assembly to duplicate original appearance.
i. All small body parts, interior, mechanical components and chassis parts are also prepared and painted in correct colors and glosses.
j. All exterior sheet metal body parts are color sanded and buffed to a glass-like finish. Some select interior parts receive the same finishing as needed.
19. After refinishing, all parts and components are reassembled.
a. Mechanical and chassis parts are assembled first, giving other parts and components their place to reside.
b. Parts are detailed and assembled.
c. The body is installed on the completed chassis unless the body and chassis are a unitized assembly.
d. Body panels, wiring, glass, dashboards, controls, bright-work and interiors (and if a convertible, tops) are fitted and installed.
20. Test run of the engine and related accessories.
21. As assembly is completed, final adjustments and fine tuning is performed.
22. Completed project is usually test driven extensively (100-200 miles) to insure operation and performance prior to customer delivery. (Note: Some projects that are much less extensive may require much less test driving or even no test driving depending upon the nature of the project. Some vehicles may be so fragile or valuable as to make extensive test driving imprudent or impractical.)


365 Arden Nollville Road
Inwood, WV 25428
info@vintagemotorcarco.com
304.821.1326